Lets have another look at that dress:
not pregnant? don't panic! you can still make this dress and be (almost) as awesome as us pregnant ladies!
Whole Lotta Baby Upcycled T-shirt dress TUTORIAL
You will need:
- 2 Large Mens T-shirts
- some scrap stretch jersey fabric (or another T-shirt)
- A T shirt/vest that fits you comfortably (Template t-shirt - with similar stretch properties to your donor T shirts)
- A sewing machine (or even better - a Serger!)
- Stretch fabric needles
- Dressmaker’s chalk
- Suitable scissors
- Pins
Measurements:
Put on your template T shirt and draw a line where your bump begins (or your empire line - under bust - this is where your skirt will flare out from) and where your bump ends (or your hips - where your body is widest when you are not pregnant! this is where your skirt will be attached.) decide how long you want your skirt to be
Notes on Sewing Stretch Fabrics.
a) for best results use needles specifically designed for knit or stretch fabrics, ballpoint needles will work, needles which are specifically labelled for jersey fabric, or labelled ‘stretch’ are good. Regular needles will punch through the fibres of the fabric, possibly causing bigger holes or ripping/weakening of the fabric.
b) 99% of the people following this tutorial probably don’t have a
serger.... that’s sad because sergers LOVE t-shirt fabric! if you’re using a regular sewing machine you should use a zig-zag stitch (
here’s a video that might help) Zig zag stitch stretches, straight stitch doesn’t.
Steps:
1) using your template T-shirt, trace around the T-shirt that will form the top of your dress, down to the 'top bump line’
2) from the 'top bump line’ carry on the line straight down to form a square edge against the bottom bump line.
3) add seam allowances (I didn’t have enough spare fabric for regular seam allowances so I just sewed along the construction lines)
4) take your 2nd t-shirt
(which you’re going to make your skirt out of) and pin together front and back of the T-shirt. Draw a rectangle the width of the bottom of the top piece, and the length of the desired drop of the skirt (from bottom bump line), plus seam and hem allowance.
Are you pregnant? - make the maternity dress by following step 5a .... not pregnant? make a regular dress by following step 5b
5a) create a curve at the bottom of your rectangle, this will form your front hem shape and stop your skirt from rising up as your bump grows. My curve extends the front middle hem by about 2.5/3 inches. Cut this shape (which should give you 2 if you’ve got front and back pinned together) - flip the whole thing over and trim the back skirt piece so that hem shape there is straighter. You can check and tweak this later so don’t worry too much about straight hems at this points.
5b) Cut your rectangle shape (which should give you 2 if you’ve got front and back pinned together) this should give you your front and back skirt pieces. You can check and tweak the hemline later so don’t worry too much about straight hems at this points.
6) sew together your top t-shirt and the rectangle skirt pieces (right sides facing!!) at under bump line (or hip line)
IF YOUR WORK LOOKS LIKE THIS YOU'RE DOING IT WRONG!! - step back form your work, sit in the corner and chant 'right sides facing'for 5 minutes....
7) draft your ‘wedge’ you need a wedge of fabric to help form your dress... mine is red. it needs to be the length of your empire line/over bust line->the bottom of your hem, but other than that it’s up to you how far you make your dress to flare out at the bottom. Don’t forget to add seam/hem allowances. It also makes it easier if the top of your wedge is clipped a little so you can see where your hem allowance ends.
8)sew in first side of wedge (remember right side facing!)
9) match up your side seams right from the armpit down to the bottom hem, pin it all together paying special attention to where the wedges begin and the skirt flares out.
10) sew side seams right sides facing. Turn right side out, try on give yourself a little clap, check hems/fit etc and tweak as necessary.
Finishing
I’ve got a serger, so I just whipped out my 3 stitch serging stitch and ran across the bottom hem, I also finished the neckline and sleeves with bias tape.


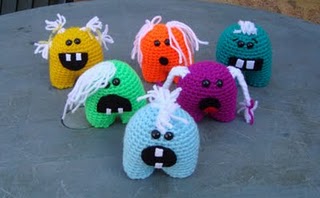 I'm just getting crochet-envy now! Check out these adorable Amigurumi mini-monsters (or Monsties, if you will) Created by crocheting blogger and fellow English person EssHaych AKA Sarah from Essex.... I went to university in Essex... small world... anyhow....


