Today let's make one of these!!
(photo credit - Craftster User Azura)
What we have here is a fashion accessory with a secret! A cuff with a secret zip compartment for for keeping your money (for MONEY people!) safe when you're out moshing :-)
I'll walk you through drafting your own pattern to fit your own wrist or you can download my pattern (my wrist circumference is 6 inches)
A few months ago a good friend of mine dropped me a facebook message asking if I'd be able to make a labcoat for his girlfriend's teddy bear as a birthday present. . . I thought, "yea, why not! there must be loads of tutorials on the Internet for stuff like that..." ... well guess what... there isn't :-/ ...
Well there is now!!
Teddy Bear Labcoat Tutorial!!
This pattern should fit teddys of these proportions.
Some modification might me needed for smaller/larger teddies!
arm circumference 12 cm
neck 26 cm
under arm circumference 28 cm
waist 34 cm
neck to foot 22 cm
neck to top of leg 14 cm
arm length 12.5 cm
Pattern Pieces: right click and "Save Target as"/"Save image as"
I haven't figured out the whole PDF thing yet, so I've included a tape measure on each one so you can be sure you've got the sizes right for printing.
2x circles (interfaced) - I used a side plate with a 8 1/4 inch diameter
2x long side pieces (1.5x28 inches)
2x short side pieces (5 1/2x3 3/4 inches)
LONG zip, doesn't matter too much how long as long as it goes most of the way around your circle.
LINING:
2x circles (with or without interfacing depending on quality of fabric. I did mine without.) - same size as outer.
2x long side pieces (1.5x28 inches)
2x short side pieces (5 1/2x3 3/4 inches)
Pocket piece - semi circle same size as other circular pieces with around 1 inch added to straight side for hemming.
Wrist strap (3x12 inches)
3 Needlebook pieces (5x4 inches) (5x6 inches) and (5x8 inches)
My Embellishments:
My labels and my Star Wars decal were made by interfacing fabric and then using iron on ink jet transfer paper to transfer the design, REALLY easy to do, and the possibilities are endless for you to customise this up any way you like.
EDIT: the image is from Deviant Art user Jasonpal - you should check out his gallery, it's great work! the speech bubbles were ALL my idea :-)
The Method:
Please let me know if you've used my tutorial, I'd love to see what other people have made using this design <3!!
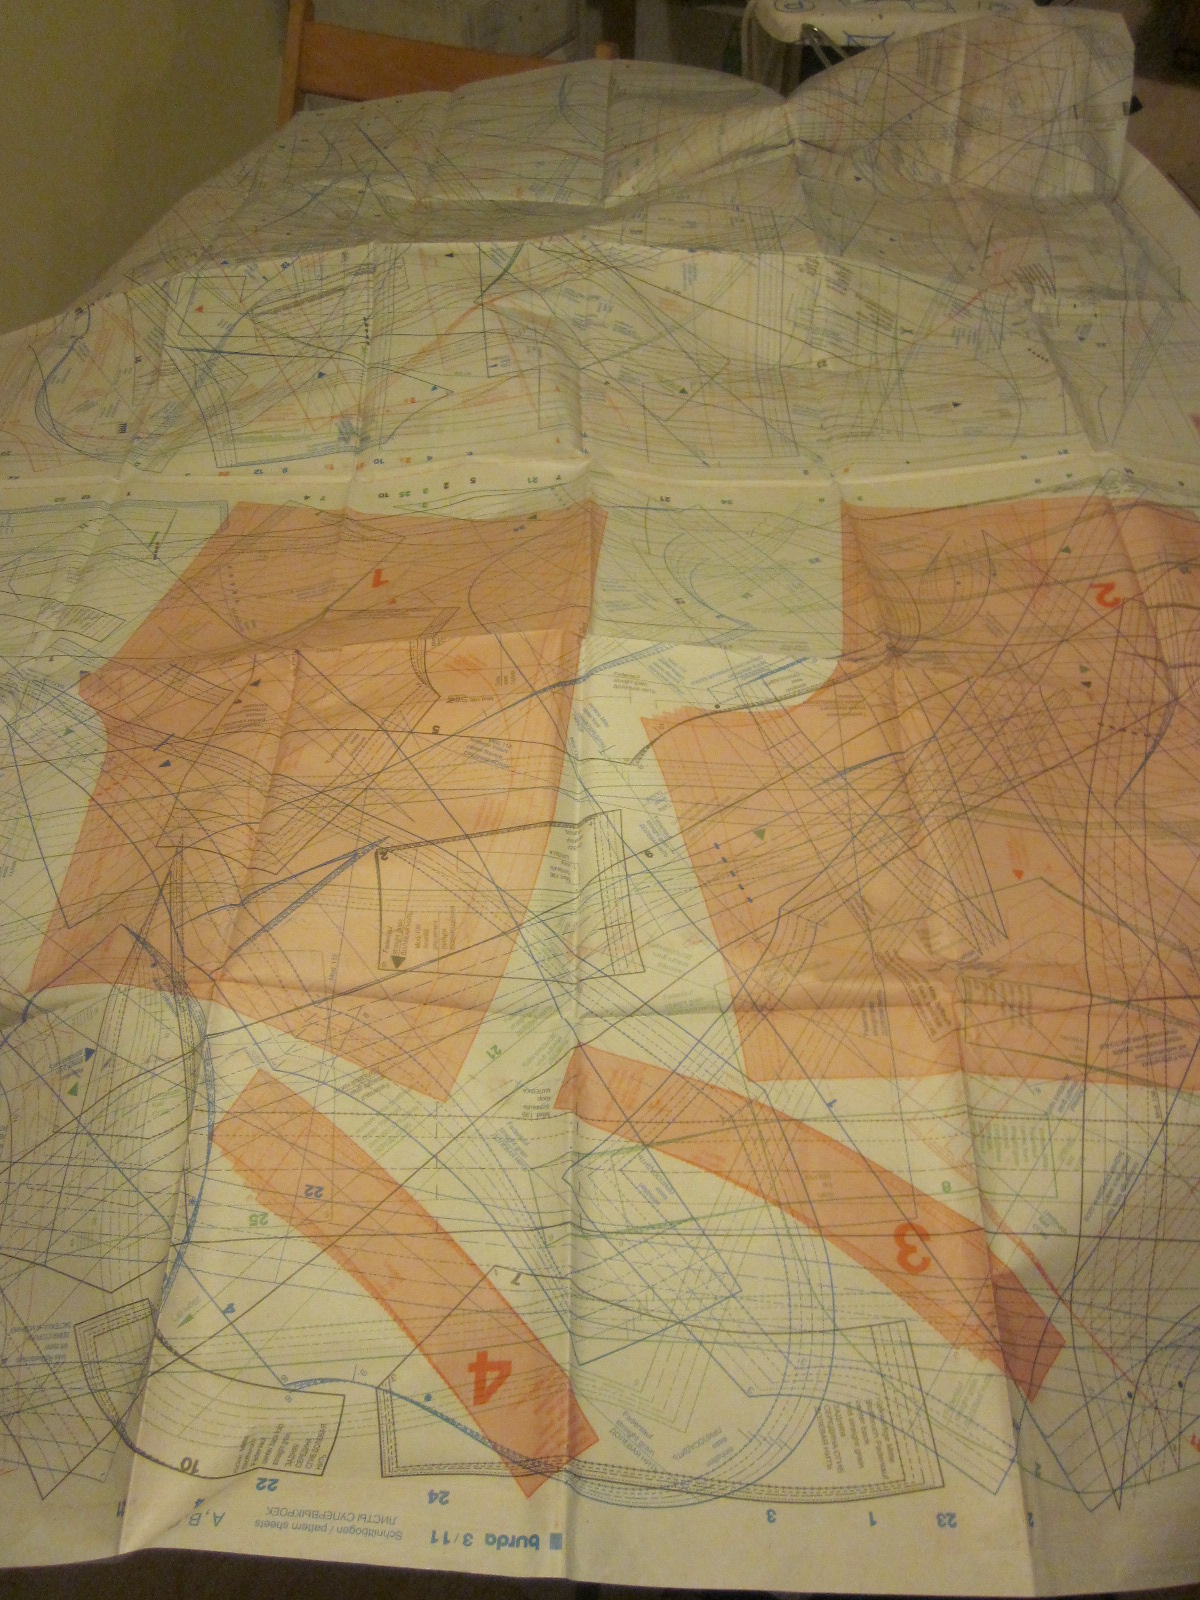
until Project Maternity I'd never used one of these before... just simply because they scared the hell out of me... see exhibit A:
see? scary as hell! It's just a big old mess of lines! where do I start?!?ok.. . don't panic... what you've got here isn't just one big pattern sheet... it's 4 big pattern sheets! there's a big ol' 'cut here' line down the middle... cut there!.... then - to the iron!
So... lets use our common sense here - paper is known for it's flammable qualities so you're going to tun your iron down a tad and move quickly with it over the paper. you need to iron your pattern sheet or it's going to be really hard to trace it in a minute.
see? that's better huh?... hmm.. you still need to find the pattern pieces you need... and it's so hard in that mess of lines!... ok... look up your pattern in the magazine, you should find a diagram looks like this:
see? this one tells us that we're looking for the green pattern pieces on sheet A, numbers 21-15. We can see that the pattern is sized 36-44 also... you need to know which size you're cutting out. If you don't know already you need to find the page in your magazine that looks like this and find your measurements:
but it's still hard to find the pattern piece even if you know what you're looking for and what colour the lines are... but Burda have thought of that! yeyy!
see them numbers?... well say if I'm looking for green piece 24, if I look on a straight line up from the green 24 in the margin, I'll find a green 24 in the mess of lines.... and that green 24 will be next to a green line which should be the line for your pattern piece. I've foiund it's really helpful to trace around your pattern piece with your finger to make sure you've found the right one, and you know how it goes.
ok you need big tracing paper and some weights, I suggest tuna cans:
see? then it's just tracing... which is fun :-) any 5 your old can trace! remember to copy any darts, grainlines etc... and another thing! Burda Style Magazine patterns don't come with a seam allowance! you need to add your own, and your hems. this is good because you can do this after any alterations you need to do to your pattern, linke when I did my full tummy adjustment:
anyhoo! I hope that helped! and BurdaStyle pattern sheets are no longer scary!!
So... yesterday I posted about my Husbot's valentines card. I created this by embroidering card... because I've forgotten how to use pens:
This technique can be used to much better effect than displayed above :-) be imaginative, sew bits of paper together, indulge in a bit of paper applique, combine paper and fabric... but whatever you do the general technique is going to be the same:
What you can see in the above picture is my pattern (to the right) and my card (to the left) The trick with card embroidery is that you need to make the holes first.
1. Place your pattern on top of the card you're using and place the whole thing on top of a pricking mat (some people may have a pricking mat... I suggest using corrugated cardboard for a low-cost disposable alternative).
I used my ironing board which I don't suggest, because it can be hard work if you're hitting against metal mesh all the time. the idea is that you should be able to put a pin through your pattern and card (in other words - make holes) and have something behind it so you don't damage your dining table :-)
2. Continue to prick (make holes in) your card, using your pattern as a guide. These holes will replace the holes you would make when embroidering normally, so you need to make a hole wherever your thread will change direction.
Be Careful. You can buy 'pricking tools'... I didn't... I used a pin, which I pushed in with my fingers, which was a bad idea. I figured out later that it would be easier if I used a thimble, but my thimble doesn't fit. and that is the start of the series of unfortunate events that led to me bleeding on my card later on... bleeding on card is not good... there's not a lot you can do to fix it...
3. Once you've pricked all your holes, remove the pattern and embroider as normal!
Obviously you can't use an embroidery hoop with this thing so just be careful about how much you're bending/tugging on the card
Keep your pattern for reference, it's quite possible you'll forget where you're supposed to be stitching to as you've essentially got a massive, un-numbered dot-to-dot.
Use good embroidery thread! I used 2 strands of DMC. If you use cheap rubbish it WILL snap and it WILL get fluffy, card is more scratchy than fabric.
With this super sweet shirt to pillow transformer from Thinkgeek we can all live our thrifty dreams by recycling old, unwanted and damaged T-shirts (or just plain cool ones) into useful household furniture! I've thought about turning T-shirts into pillowcases before, but thought that the jersey material would soon get stretched out of shape if used for upholstery, this nifty item completely solves that problem and removes all requirement to sew...


