Friday, March 18, 2011
Monday, March 14, 2011
PM: Today I went to School Dressed as a Strawberry:

If you're not on my facebook page (you really should be) you're behind on news... I've finished something!! Take a peek at what I'm affectionately calling my strawberry maternity pencil skirt:


The pattern for this skirt is available on Burdastyle (you can see my submitted project here)
I know... it's crazy and not everyone's cup of tea, but if you cant dress like a crazy woman when various hormones are *actually* making you crazy, what's the point of anything!
x G
Friday, March 11, 2011
I just blogged for the NHS people!!
Cross posted at the NHS talk Blog
--------------------------------------------------------------------------------------------------------------
Hello Everyone!!
I'm Samantha, I'm a 23 year old secondray school teacher. My superhero alter ego is a geek culture and craft blogger at Geeky Sweetheart. I've also started a baby specific blog at Teensy Geek. I'm in the process of making my own maternity wardrobe (I'm calling it Project Maternity as an homage to one of my favourite TV programmes). I love karaoke and 80's Metal music.
Last week I had my 20 week scan which was a really great experience! It was much less scary then my 12 week scan. Here's both the pictures and I'll talk about how they were different afterwards:
12 Weeks:

20 Weeks:

Before my 12 week scan I was PETRIFIED! I was so stressed out about it all, I was grumpy and irritable at school, I was constantly exhausted having to go to bed sometimes as early as 7/8pm (which is absolutely unheard of for me) I didnt have morning sickness, but I completely lost my appetite and found to really difficult to eat a full meal. For one reason or another I hadn't been to see a midwife at all until after my 12 week scan so the scan was the first time I saw a health professional about my pregnancy.
The 20 week scan was a completely different deal... I've still only got a little bump, but my bump had started to develop just before my 20 week scan. I'd also been feeling movements since around 16 weeks and kicks at around 19 weeks. My baby is very active, it's so reassuring! I was sitting in the waiting room for my 20 week scan wondering why I was so relaxed compared to my 12 week scan and that's essentially what it comes down to, I can feel my baby (I can him/her Squiggle) punching, kicking and doing sumersualts which I couldn't before because s/he was so tiny.
I didnt find out the gender at the 20 week scan. I think there's a lot to be said for surprises. I also would begrudge being forced to spend my life surrounded by exclusively pink or blue things before my Squig has even surfaced.
I've just finished my own home-made maternity top, but unfortunately I wore it to work today and when I came home I got cottage cheese all down the front of it! So I guess I'll be back in the next couple of days with informaton about clothes and my bump!
See you then!
--------------------------------------------------------------------------------------------------------------
Hello Everyone!!
I'm Samantha, I'm a 23 year old secondray school teacher. My superhero alter ego is a geek culture and craft blogger at Geeky Sweetheart. I've also started a baby specific blog at Teensy Geek. I'm in the process of making my own maternity wardrobe (I'm calling it Project Maternity as an homage to one of my favourite TV programmes). I love karaoke and 80's Metal music.
Last week I had my 20 week scan which was a really great experience! It was much less scary then my 12 week scan. Here's both the pictures and I'll talk about how they were different afterwards:
12 Weeks:
20 Weeks:
Before my 12 week scan I was PETRIFIED! I was so stressed out about it all, I was grumpy and irritable at school, I was constantly exhausted having to go to bed sometimes as early as 7/8pm (which is absolutely unheard of for me) I didnt have morning sickness, but I completely lost my appetite and found to really difficult to eat a full meal. For one reason or another I hadn't been to see a midwife at all until after my 12 week scan so the scan was the first time I saw a health professional about my pregnancy.
The 20 week scan was a completely different deal... I've still only got a little bump, but my bump had started to develop just before my 20 week scan. I'd also been feeling movements since around 16 weeks and kicks at around 19 weeks. My baby is very active, it's so reassuring! I was sitting in the waiting room for my 20 week scan wondering why I was so relaxed compared to my 12 week scan and that's essentially what it comes down to, I can feel my baby (I can him/her Squiggle) punching, kicking and doing sumersualts
which I couldn't before because s/he was so tiny.I didnt find out the gender at the 20 week scan. I think there's a lot to be said for surprises. I also would begrudge being forced to spend my life surrounded by exclusively pink or blue things before my Squig has even surfaced.
I've just finished my own home-made maternity top, but unfortunately I wore it to work today and when I came home I got cottage cheese all down the front of it! So I guess I'll be back in the next couple of days with informaton about clothes and my bump!
See you then!
Thursday, March 10, 2011
Demystifying the Serger/Overlocker
I'm not an expert, I've only had this thing for 6 days. But I'm in love with it.

Yes it looks confusing... let me help:
 DON'T PANIC!! everything's colour coded, people go on and on about how difficult an overlocker is to thread... and yes it's more complicated than a normal sewing machine, but it's got 4 spools of thread and it does awesome stuff!!... here's the trick, if you can thread a normal sewing machine, you can probably sew a serger. Most sergers have nice colour coded diagrams like this and instructions...
 if you look carefully you'll also notice that all the little thready hooks and loops and things inside are all colour coded too! so you really can't go wrong.
 These little fellas are interesting. On a normal sewing machine you'd have your different stitch settings (zig-zag, elastic stitch, straight stitch, buttonholer etc) but on your overlocker all your different stitches are mode by fiddling with these little tension dials. Again, seems complicated, but you'll have diagrams and settings for different types of stitch in your instruction book.

of course you've got different thread, you need to use 'cones' like the one on the right instead of reels like the one on the left. you don't have a bobbin, you've got the lower loopers instead so all the thread you use is mounted on the back of the machine.

here's some interesting knobs... haven't fiddled with them yet... will let you know when I do...
and here's the sucker all threaded up:


 I videoed it for you:
And this is how it turned out it the end:

 Yup I need to fiddle with my tension dials, but that stitch is reasonably acceptable.
So... now you know everything I know about serged sewing...

Yes it looks confusing... let me help:


of course you've got different thread, you need to use 'cones' like the one on the right instead of reels like the one on the left. you don't have a bobbin, you've got the lower loopers instead so all the thread you use is mounted on the back of the machine.

here's some interesting knobs... haven't fiddled with them yet... will let you know when I do...
and here's the sucker all threaded up:


OK, so I'm going to serge this delightfully green fabric. I'm using a 4 thread stitch so my machine serges the edges and stitches at the same time

And this is how it turned out it the end:


So... now you know everything I know about serged sewing...
Wednesday, March 09, 2011
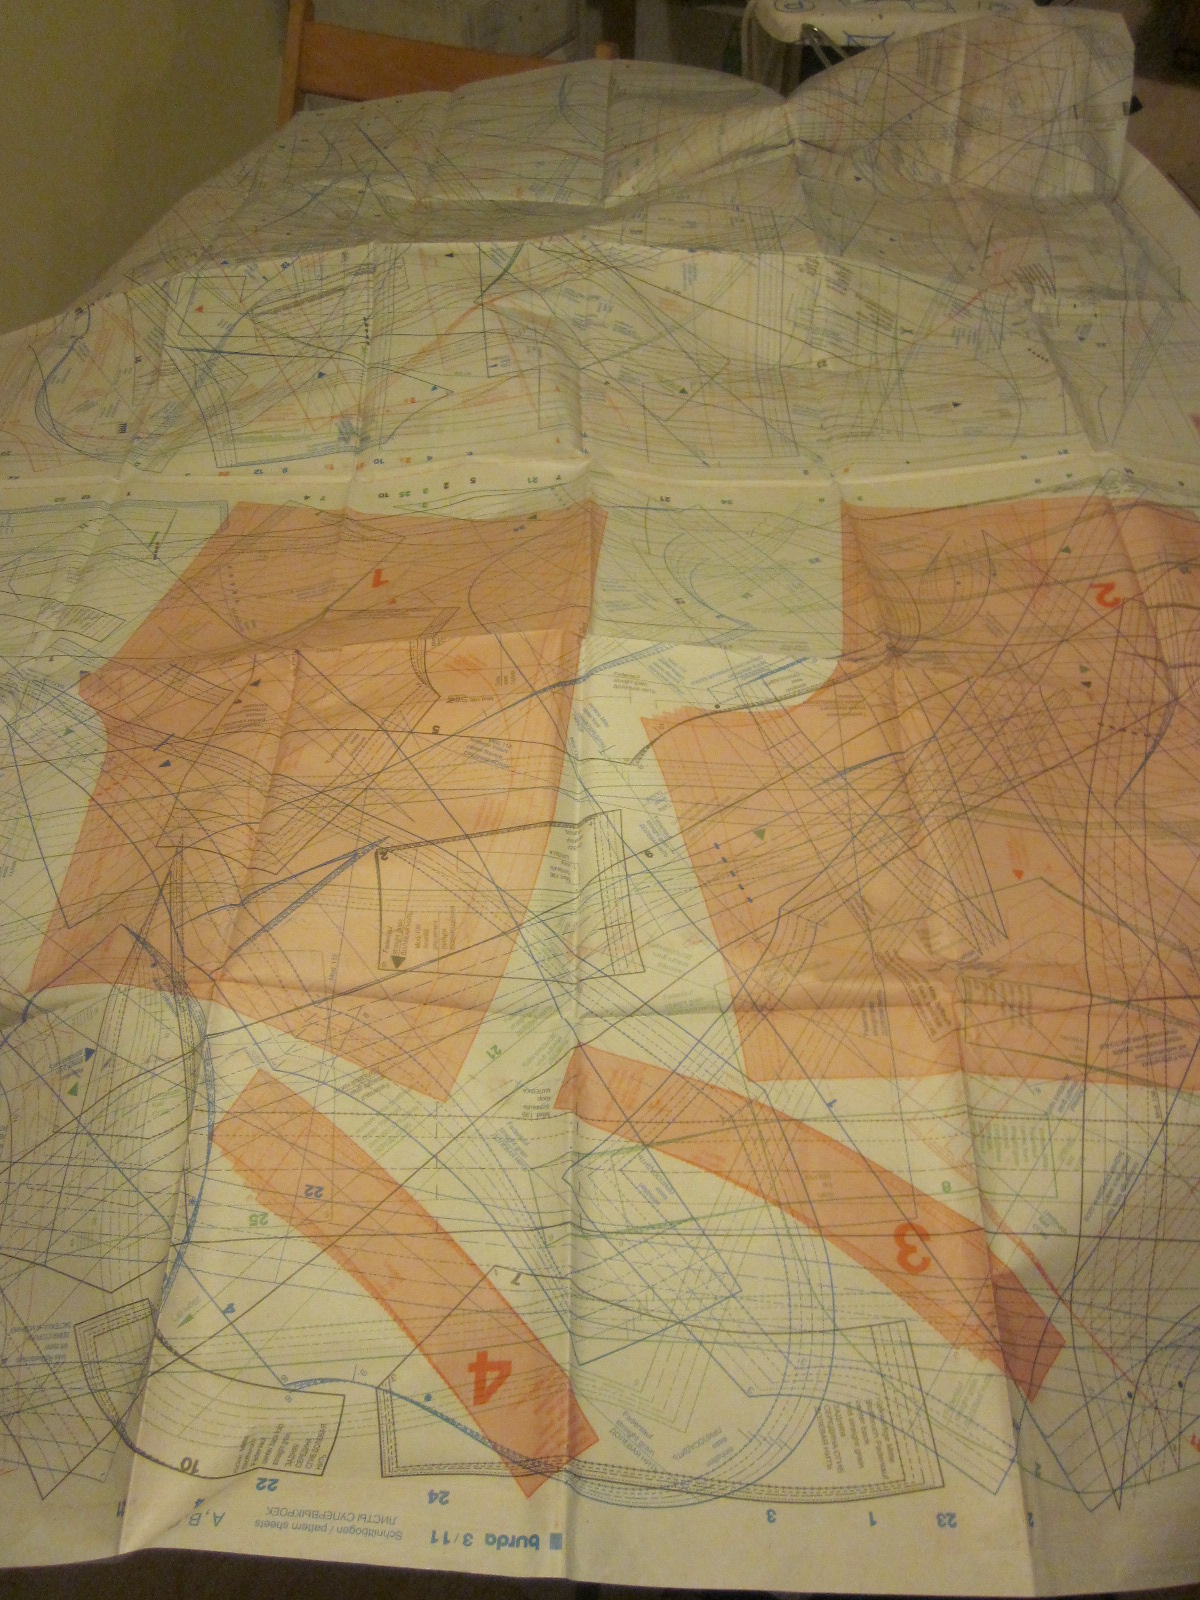
Navigating a Burda Style Pattern Sheet
until Project Maternity I'd never used one of these before... just simply because they scared the hell out of me... see exhibit A:

 see? scary as hell! It's just a big old mess of lines! where do I start?!?ok.. . don't panic... what you've got here isn't just one big pattern sheet... it's 4 big pattern sheets! there's a big ol' 'cut here' line down the middle... cut there!.... then - to the iron!

So... lets use our common sense here - paper is known for it's flammable qualities so you're going to tun your iron down a tad and move quickly with it over the paper. you need to iron your pattern sheet or it's going to be really hard to trace it in a minute.
 see? that's better huh?... hmm.. you still need to find the pattern pieces you need... and it's so hard in that mess of lines!... ok... look up your pattern in the magazine, you should find a diagram looks like this:
 see? this one tells us that we're looking for the green pattern pieces on sheet A, numbers 21-15. We can see that the pattern is sized 36-44 also... you need to know which size you're cutting out. If you don't know already you need to find the page in your magazine that looks like this and find your measurements:
 but it's still hard to find the pattern piece even if you know what you're looking for and what colour the lines are... but Burda have thought of that! yeyy!
 see them numbers?... well say if I'm looking for green piece 24, if I look on a straight line up from the green 24 in the margin, I'll find a green 24 in the mess of lines.... and that green 24 will be next to a green line which should be the line for your pattern piece. I've foiund it's really helpful to trace around your pattern piece with your finger to make sure you've found the right one, and you know how it goes.
ok you need big tracing paper and some weights, I suggest tuna cans:
 see? then it's just tracing... which is fun :-) any 5 your old can trace! remember to copy any darts, grainlines etc... and another thing! Burda Style Magazine patterns don't come with a seam allowance! you need to add your own, and your hems. this is good because you can do this after any alterations you need to do to your pattern, linke when I did my full tummy adjustment:
 anyhoo! I hope that helped! and BurdaStyle pattern sheets are no longer scary!!


So... lets use our common sense here - paper is known for it's flammable qualities so you're going to tun your iron down a tad and move quickly with it over the paper. you need to iron your pattern sheet or it's going to be really hard to trace it in a minute.


ok you need big tracing paper and some weights, I suggest tuna cans:


Monday, March 07, 2011
too busy to blog today and this is why...


Full tummy adjustment on pencil skirt coming up.. I promise
Sunday, March 06, 2011
Project Maternity - full tummy adjustment (dress)
This is the pattern I'm using:

You can also see in the picture above, I've extended the original centre front line by 3.5 inches.
The next step is to cut out the bottom left section:


"NOTE: the hemline has to come out from the center front being completely horizontal or you'll end up with a pointy front. once you get the horizontal established, you just make a curve that is pleasing to the eye"

I also modified a skirt pattern, which was slightly different, that one was my idea so I hope it works! Tell you about it tomorrow!
Subscribe to:
Posts (Atom)